Friday, December 2, 2016

Zimbra Server Migration and Zimbra Account Transfer – The Perfect Method

1. Introduction

Zimbra project doesn’t have a cross migration or proper account transfer documentation. All they tell is to do copy the folder /opt/zimbra to your new servers. But if any of those files infected with a rootkit or other malicious scripts , then your new server also will be compromised. So never sync or copy the entire directory of your zimbra installation. Zimbra also tell you to upgrade your production server to the latest version before migration. But improper upgrade may result in entire data lose. With this procedure you can do:
  • Migrate zimbra from one Operating System To another.
  • Migrate zimbra account between any hardware and Operating systems configurations.
  • No interruption on production server like software upgrade or service disable.
  • Migrate zimbra from old version to a new version server
  • Zimbra cross migrations without copying entire directories.

2. Requirement

You need an old server with zmibra account and a new fresh server with the Os you wish. Dont’ create or make any custom configuration or setting in you new server. Please make sure to set your new servers hostname same as the old one.
  • Old server
    • Need ssh root login
    • Need zimbra admin logins
    • Enough HDD space to store backups
  • New server
    • Must be installed with latest stable zimbra
    • Need ssh root logins
    • Need zimbra admin logins
    • Enough HDD space to store backups

3. Presetup

You need to setup an ssh key from the new server’s root account to the old server’s root account.
Reduce the TTL of MX records of your domain to 500 seconds . So that you can easily switch the domain’s IP after migration. Please remember to schedule the migration task on non peek hours.
Create a directory in both new and old server into which we store all required files and data for doing the migration
[root@zimbra ~]# mkdir /backups/zmigrate
[root@zimbra ~]# chown zimbra.zimbra /backups/zmigrate
[root@zimbra ~]# su - zimbra
All operation in your Zimbra server must be performed as Zimbra user itself, otherwise you will get permission and ownership issues in your zimbra server

4. Backup all data from Old server

We are going to copy all data from old server without interrupting the services.

4.1 Find all domains

You need to find all the domains from your old server. We will store the domain list in a file called domains.txt. You need to back all the domains list as follows,
zimbra@zimbra:~$ cd /backups/zmigrate
zimbra@zimbra:/backups/zmigrate$ zmprov gad > domains.txt
zimbra@zimbra:/backups/zmigrate$ cat domains.txt
fun.com
myserver.com
justfortest.com
checkit.com
dieanotherday.com
gnutest.com
foo.com
zimbra.foo.com
zimbra@zimbra:/backups/zmigrate$
Now remove all domains and subdomains related with the main hostname of your server foo.com , from this list (domains.txt) because it was already created in your new server. So there is no need to create a new domain with the same name.

4.2 Find all admin accounts

Most of these servers will have only one admin. But some servers have multiple admins. So it will be good to find all admin accounts. We will store the admins list in admins.txt
zimbra@zimbra:/backups/zmigrate$ zmprov gaaa > admins.txt
zimbra@zimbra:/backups/zmigrate$ cat admins.txt
admin@foo.com
zimbra@zimbra:/backups/zmigrate

4.3 Find all email accounts

Next step is to find all the email accounts hosted in your old server. Get a list of your email accounts and save in the file emails.txt . So from this file we can see how many accounts that need to migrate.
zimbra@zimbra:/backups/zmigrate$ zmprov -l gaa >emails.txt
zimbra@zimbra:/backups/zmigrate$ cat emails.txt
gm@fun.com
forest@fun.com
galsync@fun.com
fax@myserver.com
paul@myserver.com
angela@myserver.com
brooke@myserver.com
hnmobile1@myserver.com
maria@justfortest.com
samantha@justfortest.com
backupmail@justfortest.com
admin@checkit.com
sandra@checkit.com
zimbra@zimbra:/backups/zmigrate$
Please remove all the email accounts from the file /backups/zmigrate/emails.txt with a starting words like spam, virus, ham, galsync . There is no need to restore these accounts. Even if you still need to restore , you can do it. I don’t like spam and virus emails.

4.4 Get all distribution lists

You need to get all the distributions list and store it in a file called distributinlist.txt.
 
zimbra@zimbra:~$ zmprov gadl > /backups/zmigrate/distributinlist.txt
zimbra@zimbra:~$ cat /backups/zmigrate/distributinlist.txt
budgetrtodomainusers@fun.com
healthnowdomainusers@myserver.com
checkit.comdomainusers@checkit.com
northpointessdomainusers@dieanotherday.com
parkatnorthhillsdomainusers@gnutest.com
zimbra@zimbra:~$

4.5 Get all members in distribution lists

In this step we are going to collect all members in each of these distributions. We will create a folder called distributinlist_members and create a file under this folder named distributinlist.txt , then store all the distributions members.
zimbra@zimbra:~$ mkdir /backups/zmigrate/distributinlist_members
zimbra@zimbra:~$ for i in `cat /backups/zmigrate/distributinlist.txt`; do zmprov gdlm $i > /backups/zmigrate/distributinlist_members/$i.txt ;echo "$i"; done
budgetrtodomainusers@fun.com
healthnowdomainusers@myserver.com
checkit.comdomainusers@checkit.com

4.6 Find all email account’s passwords

Now need to find the encrypted password of all of your old email accounts and store it under a folder named userpass/ as follows:
zimbra@zimbra:/backups/zmigrate$ mkdir userpass
zimbra@zimbra:/backups/zmigrate$ for i in `cat emails.txt`; do zmprov  -l ga $i userPassword | grep userPassword: | awk '{ print $2}' > userpass/$i.shadow; done

4.7 Backup all user names , Display names and Given Names

Zimbra will accept a Names and Disaplay names in email accounts during account creation. So we need to restore those data too. We will create a directory called userdata/ which contains these details of each of those email accounts
zimbra@zimbra:/backups/zmigrate$ mkdir userdata
zimbra@zimbra:/backups/zmigrate$ for i in `cat emails.txt`; do zmprov ga $i  | grep -i Name: > userdata/$i.txt ; done

4.8 Now backup all email account

This will take some time to take backup of all email accounts. So you can run this command behind “screen”. A tgz file will be created with each emails name. We will use this files to transfer email accounts.
 
zimbra@zimbra:/backups/zmigrate$ for email in `cat /backups/zmigrate/emails.txt`; do  zmmailbox -z -m $i getRestURL '/?fmt=tgz' > $i.tgz ;  echo $email ; done
gm@fun.com
forest@fun.com
galsync@fun.com
fax@myserver.com
fax2@myserver.com
paul@myserver.com

This tgz files contains
  • Mail
  • Contacts
  • Calendars
  • Briefcase
  • Tasks
  • Searches
  • Tags
  • Folders
All subfolders are included, except Junk and Trash. There is no way to include these in the big dump, but they can be exported separately:

4.9 Now backup alias

Some times your server may have email aliases for certain accounts. So you need to copy those aliases too. We will create a sub folder called alias/ for storing the backup of Alias.
 
zimbra@zimbra:/backups/zmigrate$ mkdir -p alias/
zimbra@zimbra:/backups/zmigrate$ for i in `cat emails.txt`; do zmprov ga  $i | grep zimbraMailAlias |awk '{print $2}' > alias/$i.txt ;echo $i ;done
gm@fun.com
forest@fun.com
Some of your email accounts don’t have alias. So the above created files may be an empty file. Remove those empty files as follows,’\
zimbra@zimbra:/backups/zmigrate$ find alias/ -type f -empty | xargs -n1 rm -v 

4.10 Rsync folder to new server

Now we have all the required data to do the migration process. As a summery :
  • /backups/zmigrate – Have all the backups stored
  • /backups/zmigrate/domains.txt – Contains the domains names
  • /backups/zmigrate/emails.txt – Contains the list of email accounts
  • /backups/zmigrate/distributinlist.txt – Contains the distribution lists
  • /backups/zmigrate/distributinlist_members – Contains the members in each of your distributions
  • /backups/zmigrate/userpass – Contains the encrypted password of your email accounts
  • /backups/zmigrate/userdata – containts the email accounts user informations
  • /backups/zmigrate/alias – Contains all the aliases of your email accounts
Also the parent folder /backups/zmigrate contains a lot of zip file which are the data inside emails.
Now rsync the files as follows,
root@newserver # rsync -avp -e 'ssh -p 22' root@old-server-ip:/backups/zmigrate /backups/

5. Restore in new server

So after finishing the rsync process , we need to restore this in your new server as follows:
All this operations must be carried out as zimbra sudo user itself. Don’t use root account to store the backups
[root@zimbra ~]# su - zimbra
[zimbra@zimbra]$

5.1 Restore all domains

Now create all the domains that we have from the file /backups/zmigrate/domains.txt
[zimbra@zimbra zmigrate]$ for i in `cat /backups/zmigrate/domains.txt `; do  zmprov cd $i zimbraAuthMech zimbra ;echo $i ;done
2c86f244-de9d-4b7c-8e22-2246a8256219
myserver.com
dbf75058-d85e-4d60-8b69-1f148a456eb6
justfortest.com
ee90ffa2-505d-449f-82fd-129acb21cb5e
checkit.com
8b6bf287-f61e-4930-ada0-96b817292556
dieanotherday.com
17d3c73c-14f7-43aa-9fd2-c9be9e29c9e5
You can also verify the domains created from the zimbra admin panel too

5.2 Create email accounts and set the old password

We need to create the email accounts for storing the mails. We also need to set the old passwords too. We already collected the account info and passwords.
To Create email accounts and restore passwords . Please use the following script to create it
#!/bin/bash
#Scrit  for creating the email accounts createacct.sh
USERPASS="/backups/zmigrate/userpass"
USERDDATA="/backups/zmigrate/userdata"
USERS="/backups/zmigrate/emails.txt"
for i in `cat $USERS`
do
givenName=$(grep givenName: $USERDDATA/$i.txt | cut -d ":" -f2)
displayName=$(grep displayName: $USERDDATA/$i.txt | cut -d ":" -f2)
shadowpass=$(cat $USERPASS/$i.shadow)
tmpPass="CHANGEme"
zmprov ca $i CHANGEme cn "$givenName" displayName "$displayName" givenName "$givenName" 
zmprov ma $i userPassword "$shadowpass"
done

5.3 Restore email accounts

Now we are going to restore the emails from the Zip file. This process may take some hours. So it will be good to run behind “screen” command.
[zimbra@zimbra zmigrate]$ for i in `cat /backups/zmigrate/emails.txt`; do zmmailbox -z -m $i postRestURL "/?fmt=tgz&resolve=skip" /backups/zmigrate/$i.tgz ;  ; echo "$i -- finished "; done
gm@fun.com -- finished 
forest@fun.com -- finished 

5.4 Now recreate the distribution lists

It is time to recreate all the distribution lists as follows.
[zimbra@zimbra zmigrate]$ for i in `cat distributinlist.txt`; do zmprov cdl $i ; echo "$i -- done " ; done
2a852fd8-6e66-426e-a76d-15192536042a
budgetrtodomainusers@fun.com -- done 
a0f6ddb3-8525-4194-9397-6cf0a920dda6

5.5 Restore the distribution lists

After creating the distribution lists we need to add all the members inside the distribution lists. We have the distribution lists in the folder distributinlist_members/ and the list is in distributionlist.txt file. Please use the following small script to restore the distribution lists.
[zimbra@zimbra zmigrate]$ cat restoredist.sh 
#!/bin/bash
# add all memebers to each of these distribution lists
for i in `cat distributinlist.txt`
do
 for j in `grep -v '#' distributinlist_members/$i.txt |grep '@'` 
 do
 zmprov adlm $i $j
 echo " $j member has been added to list $i"
 done

done

5.6 Restore Alias accounts

Please use the following script to restore alias. This will add all the aliases in your email accounts.
#!/bin/bash
for i in `cat /backups/zmigrate/emails.txt`
do
 if [ -f "alias/$i.txt" ]; then
 for j in `grep '@' /backups/zmigrate/alias/$i.txt`
 do
 zmprov aaa $i $j
 echo "$i HAS ALIAS $j --- Restored"
 done
 fi
done

6. Conclusion

So now we migrated all our email accounts. It is time for DNS change. You need to shut down the old zimbra services and change the DNS. After that send some test emails and make sure everything is working fine. Next step is to secure your zimbra server. You need to install ssl certificates and firewall in your new zimbra server. Now you have a new server with new packages and files with the same old email accounts and its data.

7. References

https://wiki.zimbra.com/wiki/Zmprov_Examples
https://wiki.zimbra.com/wiki/Zmprov
https://wiki.zimbra.com/wiki/Backing_up_and_restoring_Zimbra_%28Open_Source_Version%29
'https://xmission.com/blog/2015/04/30/zimbra-server-admin-tip-mailbox-password-migration-and-server-settings-comparison'
http://stdout.no/zimbra-open-source-backup-strategy-and-scripts/

Zimbra Server Migration

From syslint.com

How to install Malware Detect ( maldetect or LMD ) in Debian 8

1. Introduction

Malwares are kind of malicious software which damage the system, in order to avoid such harmful threats the user should aware of the changes that he is made in the server.
Linux Malware Detect(LMD) is a malware scanner for Linux released under the GNU GPLv2 license. It is a effective tool in order to find infected files and there by removing threats.

2. Download LMD archive latest version .

Go to /usr/local/src in which we can download the latest LMD.
# wget http://www.rfxn.com/downloads/maldetect-current.tar.gz

3. Extract the downloaded file.

# tar -zxvf maldetect-current.tar.gz
Change present directory location to extracted directory
# cd maldetect-1.5

4. Run Installation Script

Install LMD by running the following script, it is the easiest way to do this installation part.
# ./install.sh

5. Edit configuration file

Open LMD main configuration file using vi editor and edit the following parameters.
#  vi /usr/local/maldetect/conf.maldet
Make sure the below value is enabled
 scan_clamscan="1"
To get mail alerts, make it to 1 else 0
email_alert="1"
The email id , in which you want to get alerts
email_addr="you@domain.com"
Set default quarantine action for malware hits
quarantine_hits="1"

To clean the detected malware
quarantine_clean="1"

The default suspend action for users wih hits
quarantine_suspend_user="0"
The minimum userid value that can be suspended
quarantine_suspend_user_minuid="500"

6. Start scanning the system

Run following command to scan the system with LMD. Use maldet followed by directory which you want to scan.
# maldet -m /usr/local/
Linux Malware Detect v1.5
            (C) 2002-2015, R-fx Networks 
            (C) 2015, Ryan MacDonald 
This program may be freely redistributed under the terms of the GNU GPL v2

maldet(29347): {scan} signatures loaded: 10822 (8908 MD5 / 1914 HEX / 0 USER)
maldet(29347): {scan} building file list for /, this might take awhile...
maldet(29347): {scan} setting nice scheduler priorities for all operations: cpunice 19 , ionice 6
maldet(29347): {scan} file list completed in 0s, found 3070 files...
maldet(29347): {scan} scan of / (3070 files) in progress...
maldet(29347): {scan} 3070/3070 files scanned: 0 hits 0 cleaned
maldet(29347): {scan} scan completed on /: files 3070, malware hits 0, cleaned hits 0, time 96s
maldet(29347): {scan} scan report saved, to view run: maldet --report 160111-0858.29347

7. To Print the result

Print the number of infected files
# maldet --report 160111-0858.29347

HOST:      amal-debian8
SCAN ID:   160111-0858.29347
STARTED:   Jan 11 2016 08:58:50 +0300
COMPLETED: Jan 11 2016 09:00:26 +0300
ELAPSED:   96s [find: 0s]

PATH:          /
TOTAL FILES:   3070
TOTAL HITS:    0
TOTAL CLEANED: 0

Linux Malware Detect v1.5 < proj@rfxn.com >

8. Update virus Signature and LMD

Execute given commands to update virus signatures and LMD version.
Update virus signatures to latest
# maldet -u

This program may be freely redistributed under the terms of the GNU GPL v2

maldet(8348): {sigup} performing signature update check...
maldet(8348): {sigup} local signature set is version 2015121610247
maldet(8348): {sigup} latest signature set already installed

Update LMD to latest
# maldet -d

Linux Malware Detect v1.5
            (C) 2002-2015, R-fx Networks 
            (C) 2015, Ryan MacDonald 
This program may be freely redistributed under the terms of the GNU GPL v2

maldet(8237): {update} checking for available updates...
maldet(8237): {update} hashing install files and checking against server...
maldet(8237): {update} latest version already installed.

9. Remove infected files

Use following command to remove infected files
Reference: From previous scan my scan ID was 160111-0858.29347, it must be different for you. You can check this from your scan results.
# maldet -n 

How to install Speedtest-cli on CentOS7 or RHEL 7

1. Introduction

Speedtest-cli is used to check the speed of uploading and downloading in the server and it use command line interface in order to perform the task. You can also test the network speed of your server too. It is quite simple to install Speedtest-cli in server. In this article we are showing the simple installation steps to follow for the installation of Speedtest-cli.

2. Install Python

Run the following command to install Python on a CentOS 7
#yum install python
Go to /usr/local/src directory in which we can download the speedtest-cli follows
# cd /usr/local/src

3 Download the speedtest-cli

Download the speedtest-cli.py file by running following command
# wget -O speedtest-cli https://raw.githubusercontent.com/sivel/speedtest-cli/master/speedtest_cli.py
Give proper permission for the downloaded file.
# chmod 777 speedtest_cli.py

4 How to test it ?

Run the following script to check the downloaded and uploaded speed .
#./speedtest_cli.py
If you run the script you will get a output like this:
Retrieving speedtest.net configuration...
Retrieving speedtest.net server list...
Testing from WorldStream (109.236.84.3)...
Selecting best server based on latency...
Hosted by SoftLayer Technologies, Inc. (Amsterdam) [33.82 km]: 4.409 ms
Testing download speed........................................
Download: 384.73 Mbit/s
Testing upload speed..................................................
Upload: 367.74 Mbit/s
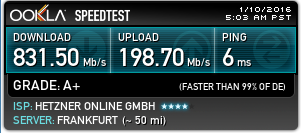
Run the following script to get an image of the result
#./speedtest_cli.py --share
speed-test
Run following command to combine both results.
#./speedtest_cli.py --bytes

If you run the script you will get a output like this:
Retrieving speedtest.net configuration...
Retrieving speedtest.net server list...
Testing from Hetzner Online GmbH (138.201.3.30)...
Selecting best server based on latency...
Hosted by HillCom Solutions (Alsfeld) [33.58 km]: 3.206 ms
Testing download speed........................................
Download: 70.50 Mbyte/s
Testing upload speed..................................................
Upload: 24.23 Mbyte/s

How To Install Laravel PHP Framework on a CentOS 7 or RHEL 7

1. Introduction

Laravel is a free, open source PHP framework designed for the fastest development of MVC (Model-View-Controller) web applications in PHP. After a great search for the best framework which I can work with, I found laravel to be the best. It is regarded as one of the most popular and secure PHP framework available today. This article will help you to install Laravel 5 PHP Framework on CentOS 7.

2. Prerequisites

2.1 Server Configuration

  • OS CentOS 7 / RHEL 7
  • Memory Minimum 512 MB
  • HDD Space Minimum

2.2 Requirements

This installation requires LAMP/LEMP with PHP 5.5 or above. You can follow my document (lampinstall.txt) to install apache, MariaDB. After that follow the steps given below to install the required php version and modules.

2.3 Setting up Yum Repositories

At first, you need to add REMI and EPEL rpm repositories in your system. These repositories have all the updated packages for the installation. Use the following commands to add them.
# rpm -Uvh https://dl.fedoraproject.org/pub/epel/epel-release-latest-7.noarch.rpm
# rpm -Uvh https://mirror.webtatic.com/yum/el7/webtatic-release.rpm
Hope you all are having the apache and MariaDB installed and configured. Now install the PHP and the required modules by the following.
# yum install php55w php55w-opcache php55w-xml php55w-mbstring php55w-pdo
Thus we have completed the basic server setup. Now we can move on to the installation of composer.

3. Install Composer

Laravel uses composer to manage its dependencies. So we need to install composer before the installation of laravel. Use the following command to install Composer.
[root@hostname-centos7 ~]# curl -sS https://getcomposer.org/installer | php
#!/usr/bin/env php
All settings correct for using Composer
Downloading...

Composer successfully installed to: /root/composer.phar
Use it: php composer.phar
Then move the composer.phar file to /usr/local/bin/ and rename it as below.
[root@hostname-centos7 ~]# mv composer.phar /usr/local/bin/composer
Give execute permission to the Composer.
[root@hostname-centos7 ~]# chmod +x /usr/local/bin/composer
Thus the installation of composer is completed. Now we can directly move on to the installation of laravel.

4. Install Laravel

Navigate to /var/www/ and download the latest version of Laravel using the commands below. Thus will clone master repo of laravel from github.
[root@hostname-centos7 ~]# cd /var/www
[root@hostname-centos7 www]# git clone https://github.com/laravel/laravel.git
Cloning into 'laravel'...
remote: Counting objects: 25968, done.
remote: Total 25968 (delta 0), reused 0 (delta 0), pack-reused 25968
Receiving objects: 100% (25968/25968), 9.70 MiB | 6.02 MiB/s, done.
Resolving deltas: 100% (13061/13061), done.
After than move to the laravel code directory and use composer to install all dependencies required for Laravel framework.
# cd /var/www/laravel
# composer install
This will take a while according to the network speed. After than set proper permissions on files.
# chown -R apache.apache /var/www/laravel
# chmod -R 755 /var/www/laravel
Thus the basic setup of laravel is completed.

5. Set Encryption Key

At first, set the 32 bit long random number encryption key by using the command below, which used by the Illuminate encrypter service.
[root@hostname-centos7 laravel]# php artisan key:generate
Application key [WRAGp0Pu9kTHiZDqbsEKGXDjSWNL76iF] set successfully.
Then update the above generated application key into the config/app.php configuration file. Also make sure that cipher is set properly.
'key' => env('WRAGp0Pu9kTHiZDqbsEKGXDjSWNL76iF')/ This key is used by the Illuminate encrypter service and should be set.      
'cipher' => 'AES-256-CBC',

6. Create Apache Virtual Host

Now create a Virtual Host in your Apache configuration file to access Laravel framework from web browser.
To do it edit the apache configuration file /etc/httpd/conf/httpd.conf and add the code below and save the file.
# vim /etc/httpd/conf/httpd.conf

       ServerName laravel.yourwebsite.com
       DocumentRoot /var/www/laravel/public

       
              AllowOverride All
       

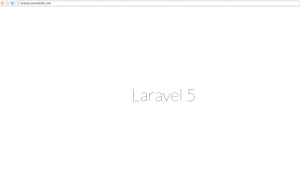
After than restart the apache service and access Laravel framework using your favourite web browser and you will see a page like the image below which means laravel is properly installed.
# systemctl restart httpd
laravel

7. Conclusion

Thus we have installed the most popular PHP framework in an easy way.

From syslint.com

How to install Nginx as Reverse Proxy in front of Apache on Ubuntu 15.10

1.0 Introduction

Nginx or “engine-x” is a high-performance web server with low memory usage, created by Igor Sysoev in 2002. Nginx is not just a web server, it can be used as a reverse proxy for many protocols like HTTP, HTTPS, POP3, SMTP, and IMAP and as a load balancer and HTTP cache as well.
In this tutorial, I will install and configure Nginx as a caching reverse proxy for an Apache web server on Ubuntu 15.10, Nginx is used as the front end and Apache as the back end. Nginx will run on port 80 to respond to requests from a user/browser, the request will then be forwarded to the apache server that is running on port 8080.

2.0 Install Apache and PHP

Log in to your ubuntu server as a root user.
Before install the package you have to update the apt cache using “apt-get”
#apt-get update
Then install apache with the apt-get command.
# apt-get install apache2
Once apache is installed, we must install PHP.
# apt-get install php5 php5-mysql libapache2-mod-php5

3.0 Configure Apache and PHP

By default, apache listens on port 80. We have to configure apache to run on port 8080 for our proxy setup as port 80 will be used by nginx later. We have to edit the apache configuration file “/etc/apache2/ports.conf”. And then proceed with the virtual host configuration in the “/etc/apache2/sites-available/” directory.
First change the port for apache to 8080 by editing the file “ports.conf” with the vim editor.
#vim /etc/apache2/ports.conf
On line 5, change port 80 to 8080 as follows.
Listen 8080
Now go to the virtualhost directory and edit the file “000-default.conf”.
   #cd sites-available/
   #vim 000-default.conf
Make sure your configuration is same as below


    ServerName www.reverse.com
    ServerAlias reverse.com

    ServerAdmin webmaster@localhost
    DocumentRoot /var/www/html

    ErrorLog ${APACHE_LOG_DIR}/error.log
    CustomLog ${APACHE_LOG_DIR}/access.log combined


Test the configuration and restart apache
  #apachectl configtest
  #systemctl restart apache2
Create a new file with the name “info.php” in the directory “/var/www/html/” with the following content
  #cd /var/www/html/
  #echo "" > info.php
Visit your site in browser
    http://ip:8080
    http://ip:8080/info.php

4.0 Install Nginx

Install Nginx with the following apt-get command
#apt-get install nginx

5.0 Configure Nginx

Once Nginx is installed, configure Nginx to act as reverse proxy for the apache web server that running on port 8080.
Go to the nginx configuration directory and edit the file “nginx.conf”.
  #cd /etc/nginx/
  #vim nginx.conf
Enable Gzip compression for Nginx by uncomment the gzip lines.
        # Gzip Settings
        ##
       gzip on;
        gzip_disable "msie6";
        gzip_vary on;
        gzip_proxied any;
        gzip_comp_level 6;
        gzip_buffers 16 8k;
        gzip_http_version 1.1;
        gzip_types text/plain text/css application/json application/javascript text/xml application/xml application/xml+rss text/javascript;

The most important is :
  • gzip on : to turn gzip compression.
  • gzip_types : is list of MIME-types which you want to turn the compression.
  • gzip_proxied any : is enable compression for proxied request.
Right under gzip settings, add these proxy cache settings:
 # Proxy Cache Settings
 proxy_cache_path /var/cache levels=1:2 keys_zone=reverse_cache:60m inactive=90m max_size=1000m;
Now we will configure a virtualhost in the directory “/etc/nginx/sites-available”
New virtualhost configuration file named “reverse.conf”.
   #cd /etc/nginx/sites-available
   #vim reverse.conf
Paste the configuration below:
   server {
    listen 80;

    # Site Directory same in the apache virtualhost configuration
    root /var/www/html; 
    index index.php index.html index.htm;

    # Domain
    server_name www.reverse.com reverse.com;

    location / {
        try_files $uri $uri/ /index.php;
    }


    # Reverse Proxy and Proxy Cache Configuration
    location ~ \.php$ {
 
        proxy_set_header X-Real-IP $remote_addr;
        proxy_set_header X-Forwarded-For $remote_addr;
        proxy_set_header Host $host;
        proxy_pass http://127.0.0.1:8080;

        # Cache configuration
        proxy_cache reverse_cache;
        proxy_cache_valid 3s;
        proxy_no_cache $cookie_PHPSESSID;
        proxy_cache_bypass $cookie_PHPSESSID;
        proxy_cache_key "$scheme$host$request_uri";
        add_header X-Cache $upstream_cache_status;
    }

    # Enable Cache the file 30 days
    location ~* .(jpg|png|gif|jpeg|css|mp3|wav|swf|mov|doc|pdf|xls|ppt|docx|pptx|xlsx)$ {
        proxy_cache_valid 200 120m;
        expires 30d;
        proxy_cache reverse_cache;
        access_log off;
    }

    # Disable Cache for the file type html, json
    location ~* .(?:manifest|appcache|html?|xml|json)$ {
        expires -1;
    }

    location ~ /\.ht {
        deny all;
    }
}


Take backup the “default” configuration file from “/etc/nginx/sites-available” directory.
  #mv default default.bak
Then activate the new virtualhost configuration.
#ln -s /etc/nginx/sites-available/reverse.conf /etc/nginx/sites-enabled/
Test the nginx configuration and restart nginx.
  #nginx -t
  #systemctl restart nginx

6.0 Configure Logging

In this step, I will configure apache to log the real ip of the visitor instead of the local IP. Install the apache module “libapache2-mod-rpaf” and edit the module configuration file.
   #apt-get install libapache2-mod-rpaf
   #cd /etc/apache2/mods-available/
   #vim rpaf.conf
Add the server IP to the line 10.
  RPAFproxy_ips 127.0.0.1 192.168.1.108 ::1

Restart apache
   #systemctl restart apache2
Test rpaf by viewing the apache access log with the tail command

#tail -f /var/log/apache2/access.log